
Photoshop is a digital software created by Adobe, the
software allows to digitally edit images and even create illustrations. It is
an extremely powerful design software that gives the option to use many tools
in order to edit your image. Throughout the workshop I learned that Photoshop
is not a program but a skill, it requires practice and knowledge of the
software in order to use it well. At first I found it very difficult to edit
images. However as I continued to use the software over the course of the week,
I began to hone my skills and create more refined edited images. In addition,
my ability and skill in using the tools offered became better as I practiced. I
discovered many tools offered by the software, all of which had different
functions and helped me to create my final product.

Example of Photoshop editing
There are many tools available to use such as the, select,
move, lasso, brushes and smudge tool.
The lasso tool enables you to select the areas you want in an image, by
tracing or drawing around the area, this can then allow you to cut out the
image and manipulate it (move it, rotate it, change scale). The lasso tool has
three options; firstly, the ‘Lasso Tool’, this allows you to draw around the
image you want, freehand, almost like using a real pen. Then there is the ‘Polygonal
Lasso Tool’, to use this option you should ‘left-click’ to select a point and
hold down the mouse button and select another point, until you have selected
the area you want. Lastly, the ‘Magnetic
Lasso Tool’ helps to select areas with defined edges. You must ‘left-click’ at
the starting point and then move the cursor along the edges and the tool
automatically selects the object.

The move tool enables you to move a selected
area around after it has been placed.

The select tool looks like a mouse cursor
and allows you to highlight an area you want.
To change the size, rotate etc… you need to go to edit then select
transform and then choose the option you want, such as scale (allows you to
resize the image). I learnt while re-sizing my images that if you hold down the
shift button, the image is
proportional as you scale it, thus preventing it from become distorted.
In Photoshop all images are in layers, a layer is basically
an image on top of another image. The images can be placed in front or behind another
image, this is the purpose of layers. It is many images on top of each other
that make one final image. Different tools such as the blend and opacity allow
to make the different layers to appear as one seamless picture.
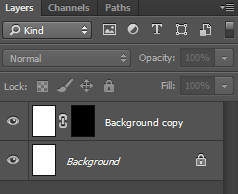
Layers in Photoshop
Before making anything on Photoshop, I would design a plan
on paper, so that I could work on my idea and prevent from making mistakes when
I design on Photoshop. It allows you too quickly alter and change your idea
without wasting time editing on Photoshop. Especially, if you are pitching
ideas, it is best to give a raw idea of what the final product will look like,
and if it is not liked, you can change it without having wasted time and energy
creating the concept on Photoshop.

Throughout the workshop I also learned some do’s and don’ts
for Photoshop. Firstly, the do’s; you can make your canvas size larger than it
needs to be so that you have room to make the design and then you can crop the
canvas down to the appropriate size.
Additionally when scaling images press the
shift key so that they remain proportional. You should also label your layers
so that they are easy to find and move around. When you select something make
sure to mean every click, because it can be very easy to select something else,
because of the huge number of options. Lastly do not over-edit images as that
can make the subject lose pixels and details and appear artificial.

No comments:
Post a Comment